Chevrolet Cobalt Service & Repair Manual: Timing Chain, Replace
| Caution: With the timing chain
removed, avoid turning the camshaft or crankshaft. If movement is required,
exercise extreme caution to avoid valve damage caused by piston contact. |
| 1. |
Disconnect and isolate battery ground
cable. |
| 2. |
Raise and support vehicle with jack
stands. |
| 3. |
Remove front fender liner. |
| 4. |
Turn drive belt tensioner clockwise. |
| 5. |
Remove serpentine drive belt. |
| 6. |
Remove crankshaft balancer bolt using
harmonic balancer holder GM tool No. J-38122-A, or equivalent, to
ensure crankshaft does not rotate while loosening mounting bolt. |
| 7. |
Remove crankshaft balancer. |
| 8. |
Remove engine front cover to water
pump bolts, Fig. 1. |
| 9. |
Remove remaining engine front cover
mounting bolts. |
| 10. |
Remove engine front cover gasket. |
| 11. |
Loosen vent hose clamp at air cleaner
resonator, air cleaner intake duct clamp at air cleaner outlet resonator. |
| 12. |
Loosen air cleaner outlet resonator
to throttle body clamp, located forward of accelerator cable bracket.
Remove air cleaner resonator to accelerator bracket bolt. |
| 13. |
Remove throttle body resonator, air
cleaner intake duct and vent hose. |
| 14. |
Disconnect accelerator and cruise control
cables from throttle body, then the bracket. |
| 16. |
Remove fuel line brackets and brake
booster hose pipe from brackets. |
| 17. |
Remove mounting screw, ignition coil
and Ignition Control Module (ICM). |
| 19. |
Remove mounting bolts and camshaft
cover. |
| 20. |
Turn engine until crankshaft sprocket
mark aligns with second silver link at five o'clock position. |
| 22. |
Ensure intake camshaft sprocket INT
diamond is aligned with copper link at two o'clock position,
Fig. 2. |
| 23. |
Ensure exhaust camshaft sprocket EXH
triangle is aligned with silver link at 10 o'clock position,
Fig. 3. |
| 24. |
Remove timing chain tensioner. |
| 25. |
Remove fixed timing chain guide access
plug. |
| 26. |
Remove fixed timing chain guide,
Fig. 4. |
| 27. |
Remove upper timing chain guide,
Fig. 5. |
| 28. |
Remove exhaust camshaft sprocket bolt
and camshaft sprocket using suitable 24 mm wrench to hold camshafts,
Fig. 6. |
| 29. |
Remove timing chain tensioner guide,
Fig. 7. |
| 30. |
Remove intake camshaft sprocket bolt,
intake camshaft sprocket and timing chain through top of cylinder
head, Fig. 8. |
| 31. |
Remove crankshaft sprocket, balance
shaft drive chain tensioner and adjustable balance shaft chain guide. |
| 32. |
Remove small balance shaft drive chain
guide. |
| 33. |
Remove upper balance shaft drive chain
guide, Fig. 9. |
| 34. |
Remove balance shaft drive chain,
Fig. 10. |
| 35. |
Install upper balance shaft chain guide. |
| 36. |
Install balance shaft drive chain with
colored links lined up on marks on balance shaft drive sprockets
and crankshaft sprocket, Fig. 11. |
| 37. |
Place copper link so it aligns with
intake side balance shaft sprocket timing mark. |
| 38. |
Move clockwise around chain, place
first chrome link inline with timing mark on crankshaft drive sprocket,
five o'clock position. |
| 39. |
Install chain on water pump drive sprocket. |
| 40. |
Align last chrome link with timing
mark on exhaust side balance shaft drive sprocket. |
| 41. |
Install small balance shaft chain guide. |
| 42. |
Tighten balance shaft chain guide bolts. |
| 43. |
Install adjustable balance shaft drive
chain guide. |
| 44. |
Turn tensioner plunger 90° in its
bore and compress plunger until paper clip can be inserted through
hole in plunger body and into hole in tensioner plunger, Fig.
12. |
| 45. |
Install timing chain tensioner. |
| 46. |
Remove paper clip from balance shaft
drive chain tensioner. |
| 47. |
Install crankshaft sprocket with timing
mark at five o'clock position, Fig. 13. |
| 48. |
Lower timing chain through opening
in top of cylinder head and ensure chain installs around both sides
of cylinder block bosses. |
| 49. |
Install intake camshaft sprocket with
INT diamond at two o'clock position, Fig. 2. |
| 50. |
Hand tighten new intake camshaft sprocket
bolt. |
| 51. |
Install timing chain around crankshaft
sprocket with second silver link aligning with timing mark. |
| 52. |
Install timing chain around intake
camshaft sprocket with copper link aligning with INT diamond. |
| 53. |
Install timing chain tensioner guide
through opening in top of cylinder head. |
| 54. |
Install exhaust camshaft sprocket with
timing chain silver link at EXH triangle aligned ten o'clock position,
Fig. 3. |
| 55. |
Install suitable 24 mm wrench to rotate
camshaft slightly, until exhaust sprocket aligns with camshaft. |
| 56. |
Hand tighten new exhaust camshaft sprocket
bolt. |
| 57. |
Install fixed timing chain guide. |
| 58. |
Apply sealant, GM part No. 12345382,
or equivalent, compound to thread and install timing chain guide
bolt access hole plug. |
| 59. |
Install timing chain upper guide. |
| 60. |
Measure timing chain tensioner when
fully compressed; tensioner will measure 2.83 inches. |
| 61. |
Install timing chain tensioner. |
| 62. |
Install suitable rubber tipped tool,
place tool down through camshaft drive to contact timing chain,
release tensioner using sharp contact downwards. |
| 63. |
Install suitable 24 mm wrench to hold
camshaft, Fig. 14. |
| 64. |
Torque mounting bolt to 63 ft.
lbs., then tighten an additional 30° turn. |
| 66. |
Raise and support vehicle with jack
stands. |
| 67. |
Install front engine cover. |
| 68. |
Torque front cover bolts to
18 ft. lbs. |
| 69. |
Torque crankshaft balancer bolt
to 74 ft. lbs., then tighten bolt an additional 125° turn. |
| 71. |
Install accessory drive belt. |
| 72. |
Inspect cooling system and fill to
proper level with recommended coolant, as required. |
| 73. |
Fill engine crankcase to proper level
with recommended engine oil. |
| 74. |
Connect battery ground cable. |
| 75. |
Start engine and confirm proper operation,
and ensure there are no leaks. |
| 76. |
Clear DTC(s) using a suitably programmed
scan tool. |
|
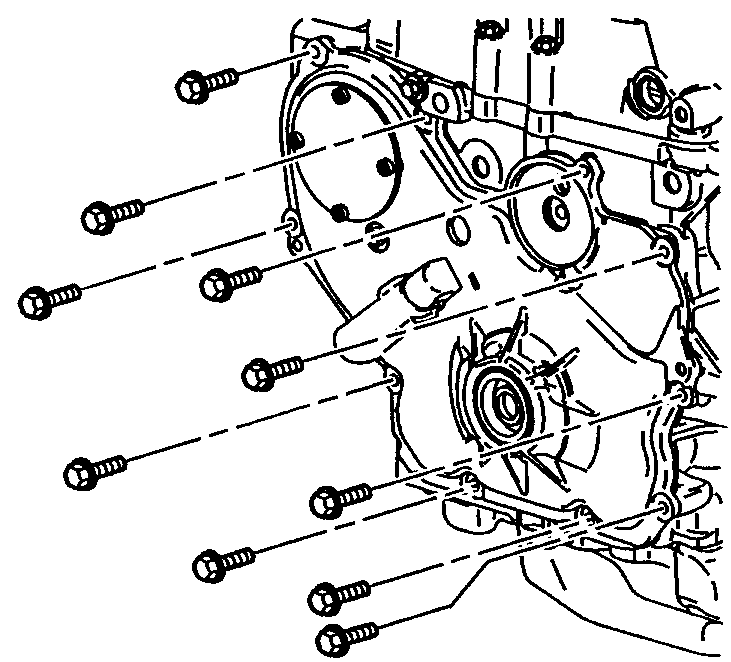
Fig. 1 Engine front cover bolt replacement
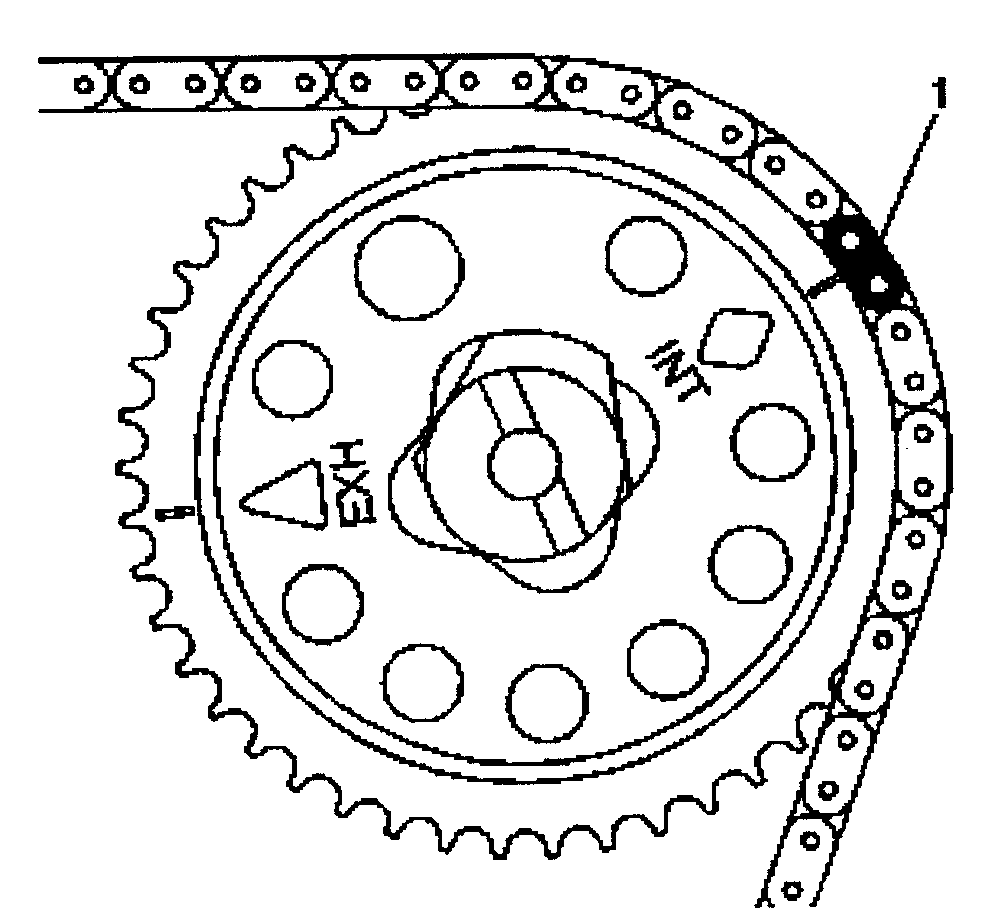
Fig. 2 Timing chain copper link alignment
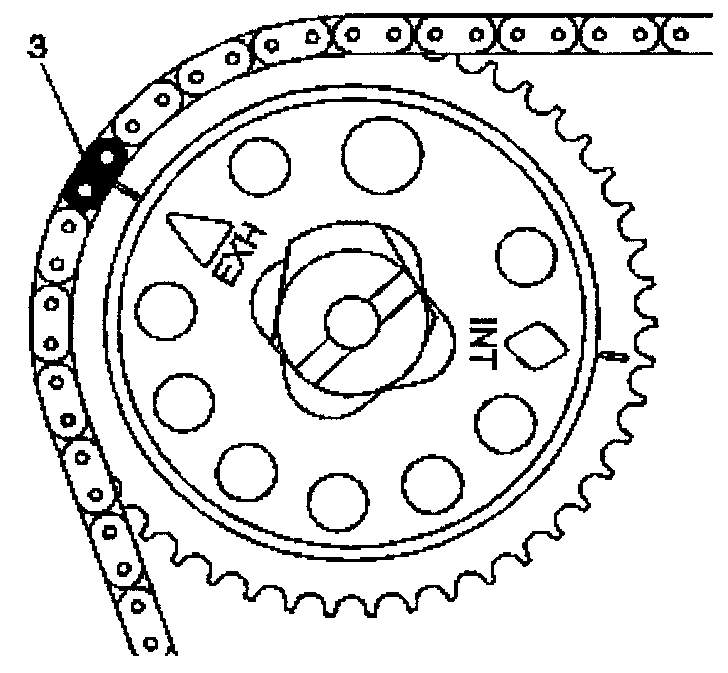
Fig. 3 Timing chain silver link alignment
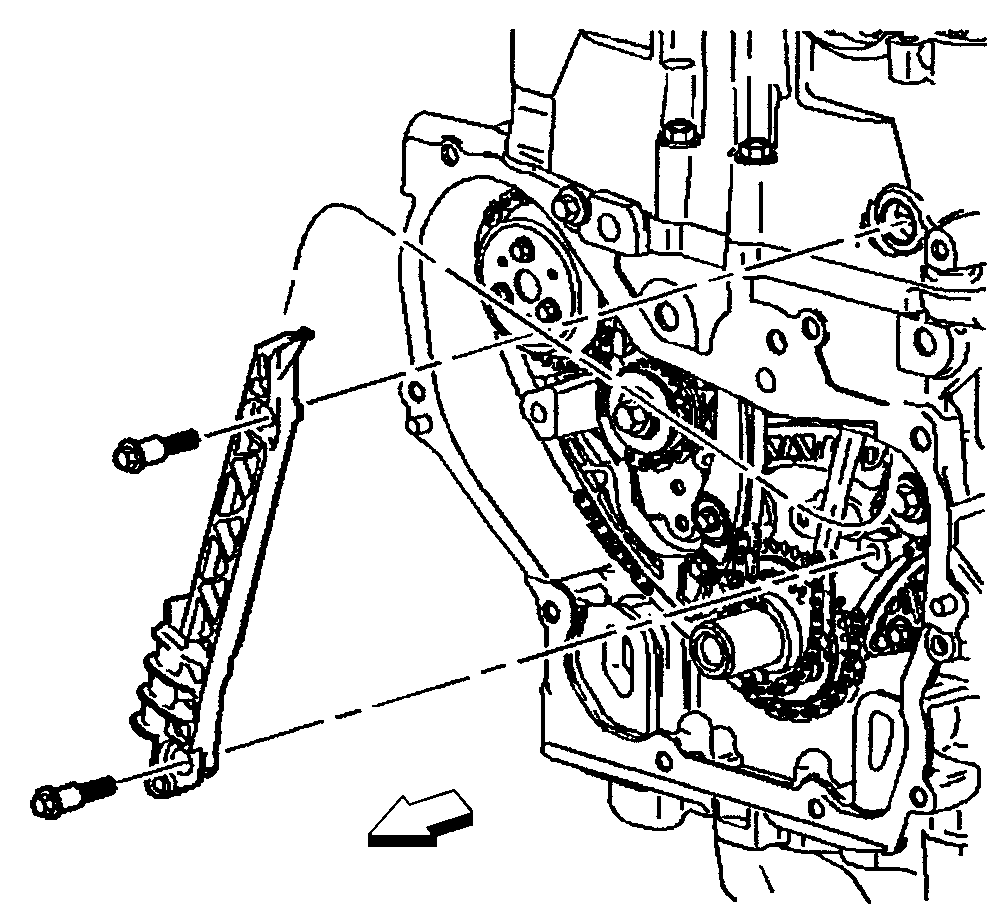
Fig. 4 Fixed timing chain guide replacement
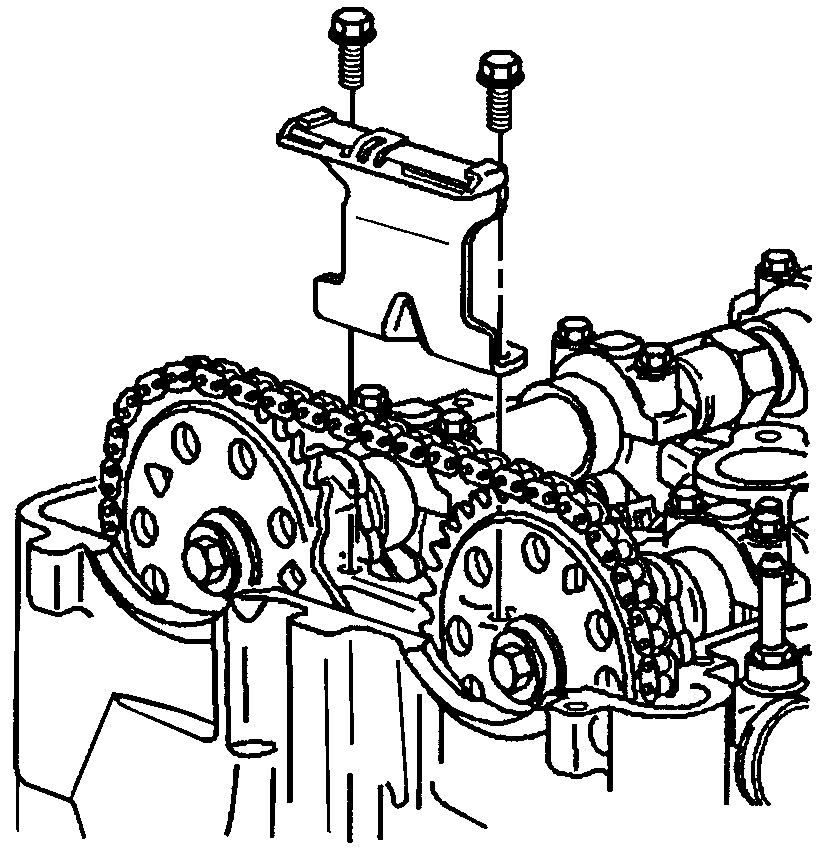
Fig. 5 Upper timing chain guide replacement
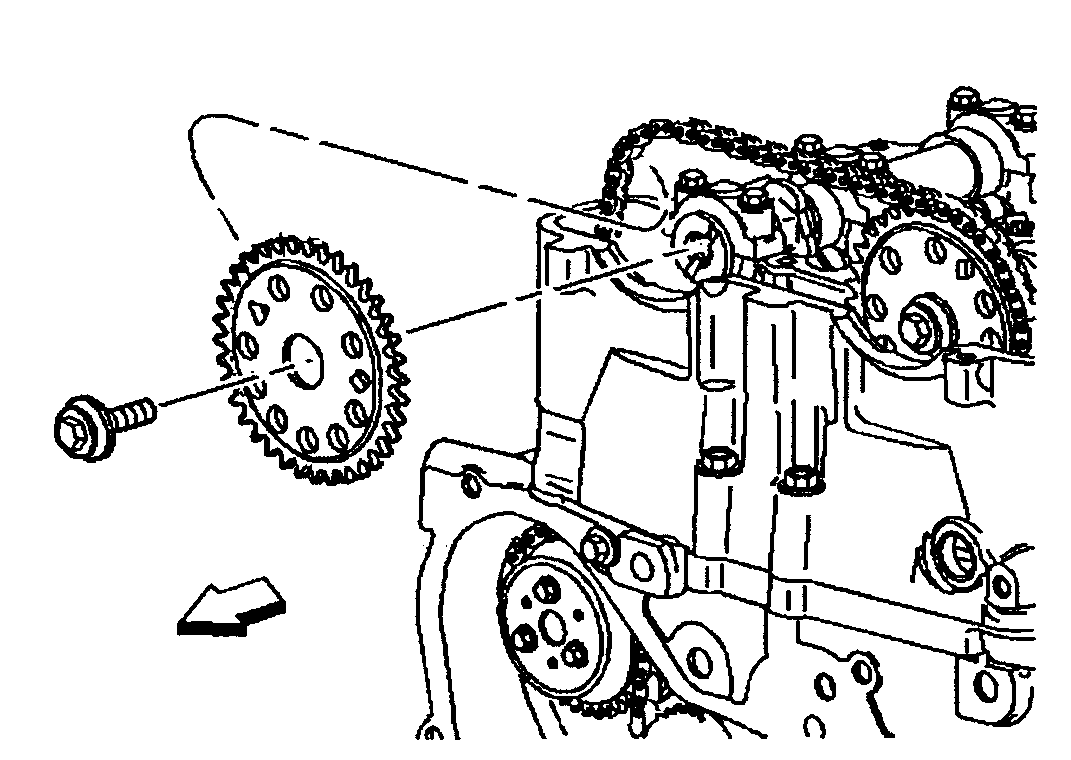
Fig. 6 Exhaust camshaft bolt & sprocket replacement
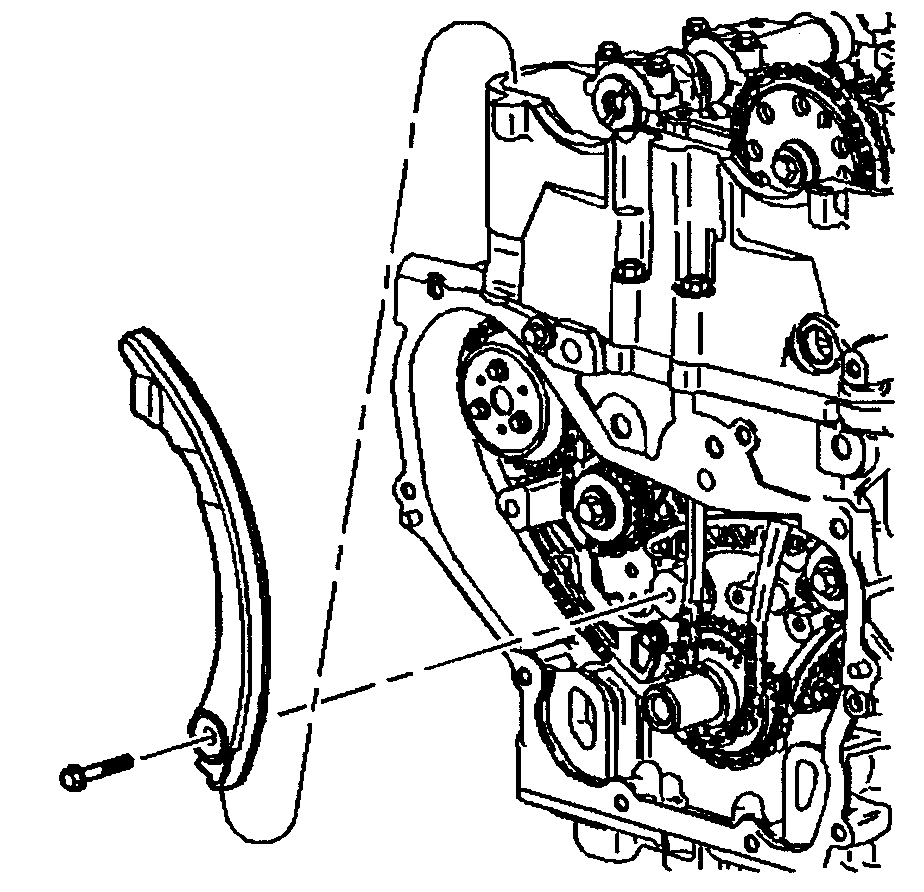
Fig. 7 Timing chain tensioner guide replacement
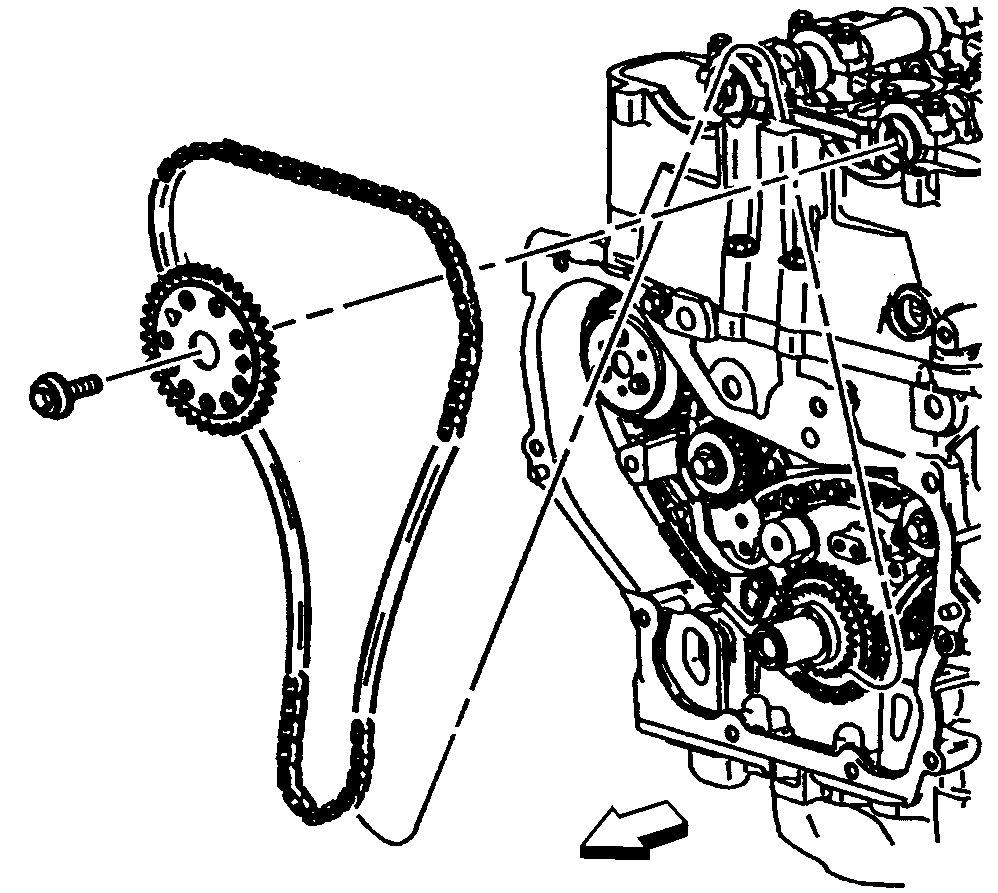
Fig. 8 Camshaft bolt, sprocket & timing chain replacement
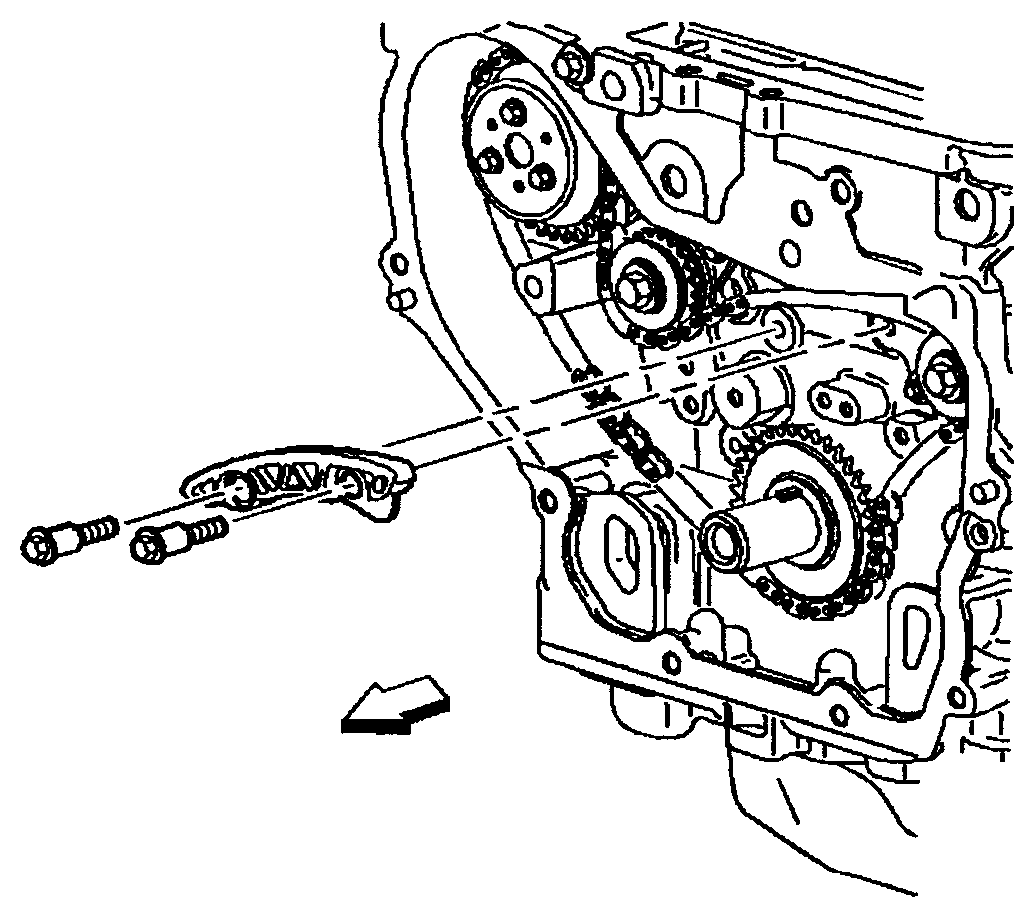
Fig. 9 Upper balance shaft drive chain guide replacement
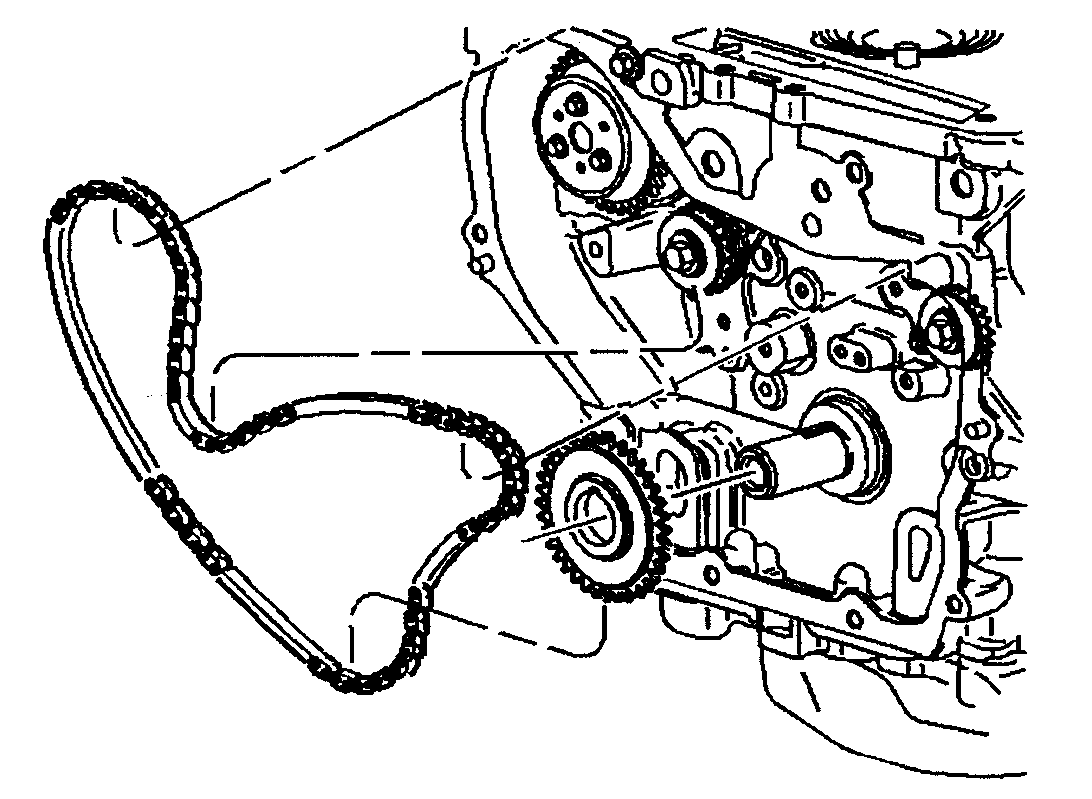
Fig. 10 Balance shaft drive chain replacement
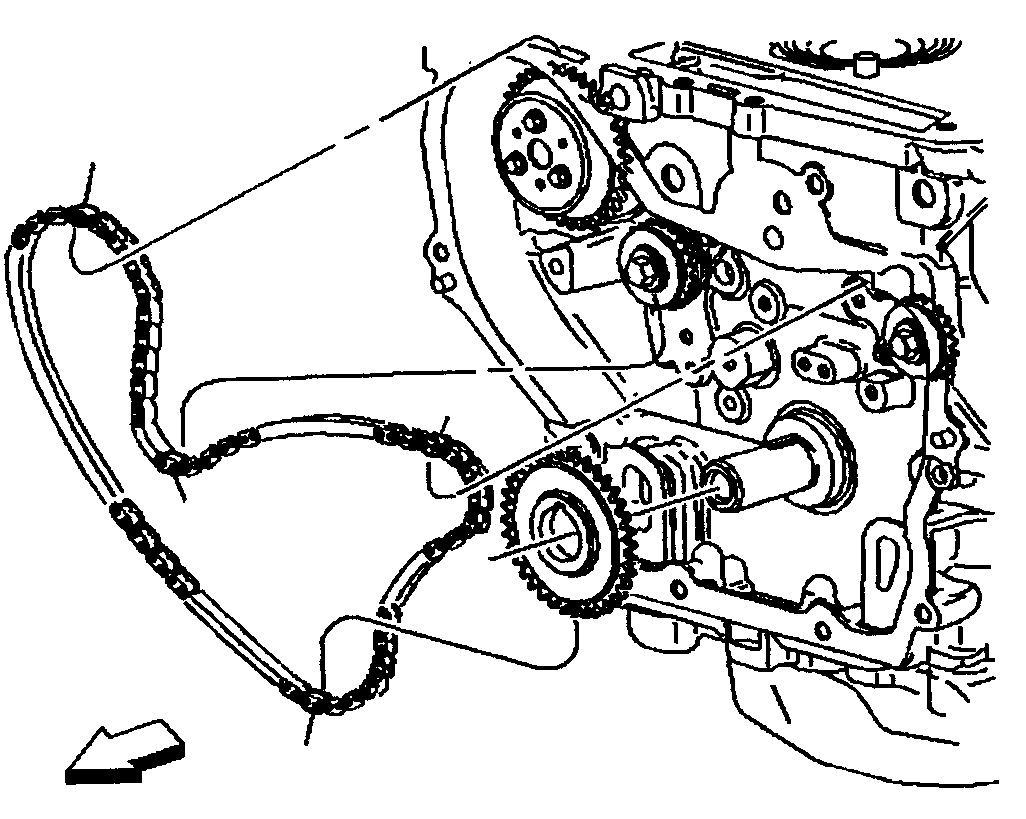
Fig. 11 Timing chain installation
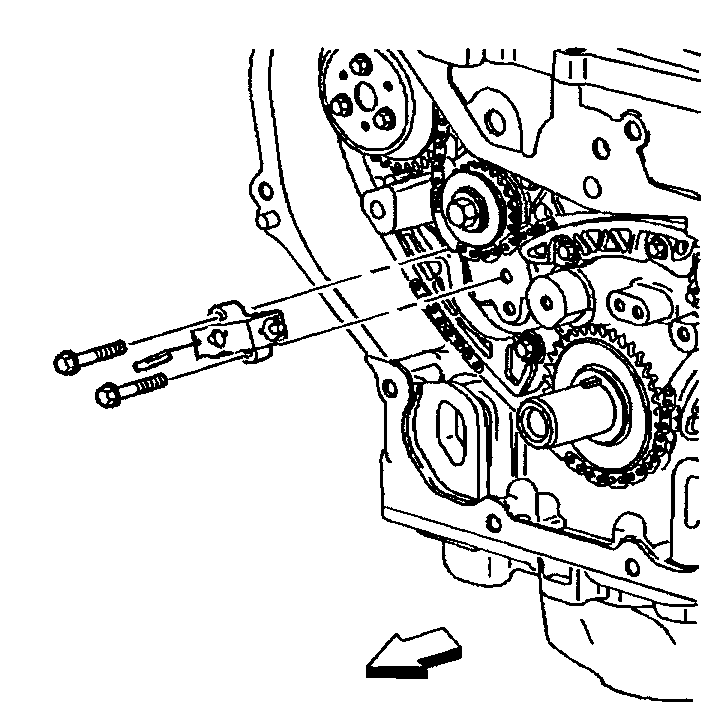
Fig. 12 Tensioner plunger & body installation
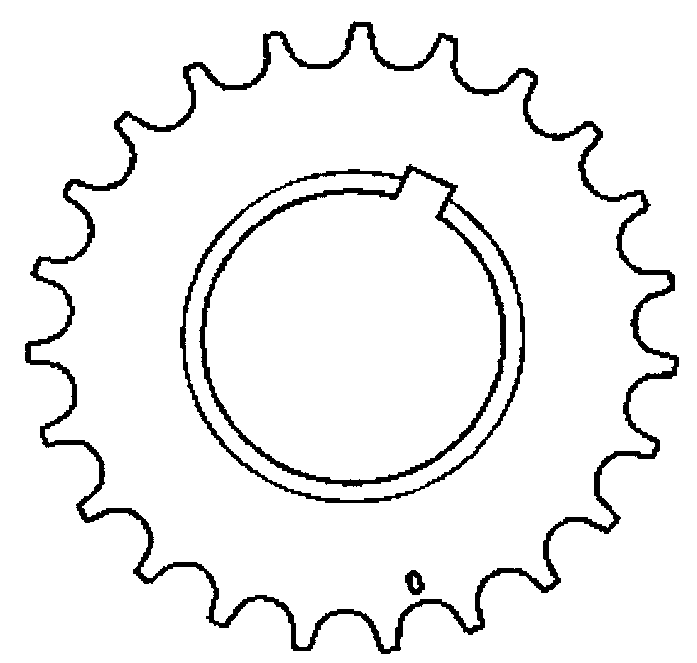
Fig. 13 Crankshaft sprocket timing mark

Fig. 14 Camshaft tightening
1.
Disconnect the negative battery cable.
2.
Remove the camshaft cover.
3.
Remove the timing chain tensioner,
...
See also:
Chevrolet Cobalt Service & Repair Manual. Vibration, Diagnosis
The designs and engineering requirements
of vehicles have undergone drastic changes over the last several years.
Vehicles are stiffer and provide more isolation from road input than they
did previously. The structures of today's stiffer vehicles are less susceptible
to man ...
Chevrolet Cobalt Owners Manual
Chevrolet Cobalt Service Manual
 Timing Chain Tensioner R & R
 Exhaust