Chevrolet Cobalt Service & Repair Manual: Balance Shaft R&R
| 1. |
Remove the balance shaft bearing carrier
bolts, Fig. 1. |
| 2. |
Remove the balance shaft assemblies. |
| 3. |
Install tool No. J-43650 installer
into the balance shaft hole and insert the tool with the foot parallel
to the shaft, Fig. 2. |
| 4. |
When tool No. J-43650 installer is
inserted in the block turn tool No. J-43650 installer so that the
foot becomes perpendicular to the shaft. |
| 5. |
Center the foot of tool No. J-43650
installer on the balance shaft bushing. |
| 6. |
Once tool No. J-43650 installer is
centered on the balance shaft bushing, insert the centering guide
into the front balance shaft bore and tighten the nut with an appropriate
wrench. When tool No. J-43650 installer is properly installed, before
removing the bushing, the end of the tool should be 4.6 inches (a)
from the block face. If tool No. J-43650 installer is less than
approximately 4.5 inches (a), recheck the tool alignment. |
| 7. |
Tighten the nut on tool No. J-43650
installer until the tension releases. When the tension releases,
remove tool No. J-43650 installer and the balance shaft bushing. |
| 8. |
Reverse procedure to install. Torque
balance shaft retaining bolts to 89 inch lbs. |
|
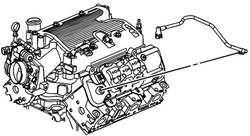
Fig. 1 Balance shaft bearing carrier bolts
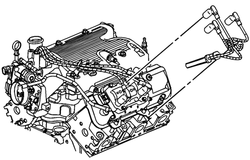
Fig. 2 Balance shaft replacement
Removal
1.
Turn Off accessories.
2.
Bring engine to operating temperature.
3.
Turn engine Off.
...
See also:
Chevrolet Cobalt Owners Manual. Tires
Your new vehicle comes with high-quality tires
made by a leading tire manufacturer. If you ever
have questions about the tire warranty and where
to obtain service, see the vehicle warranty booklet
for details. For additional information refer to the
tire manufacturer.
WARNING:
Poorly maintain ...
Chevrolet Cobalt Owners Manual
Chevrolet Cobalt Service Manual

 Engine Service
 Belt Tension Data