Chevrolet Cobalt Service & Repair Manual: Hood Primary & Secondary Latch
Removal
| 2. |
Mark hood latch location to support
bracket with a grease pencil. |
| 3. |
Remove hood latch bolts, Fig.
1. |
| 4. |
Disconnect release cable from hood
latch by squeezing cable retainer, Fig. 2. |
| 5. |
Remove hood latch from vehicle. |
|
Installation
| 1. |
Install hood latch release cable to
hood latch, Fig. 2. |
| 2. |
Position hood latch to alignment marks
on support bracket. |
| 3. |
Install hood latch bolts, Fig.
1. |
| 4. |
Tighten latch bolts with latch in full
up position. |
| 5. |
Slowly close hood and press down until
hood is flush with fenders. |
| 6. |
Raise hood. Torque bolts to
89 inch lbs. |
| 7. |
Adjust hood, if required as outlined
in Hood. |
|
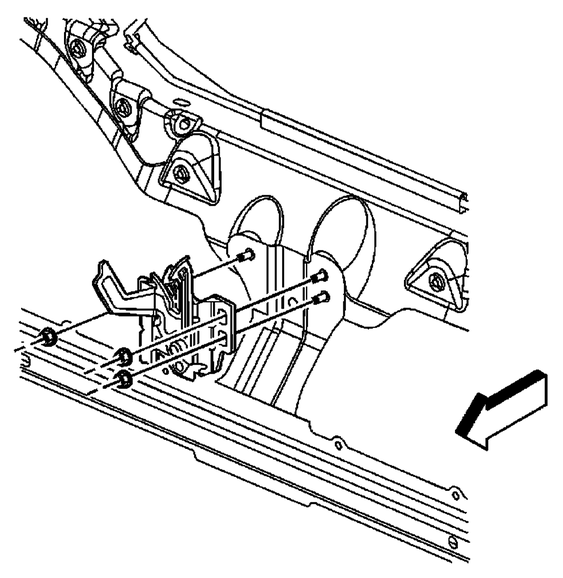
Fig. 1 Hood latch
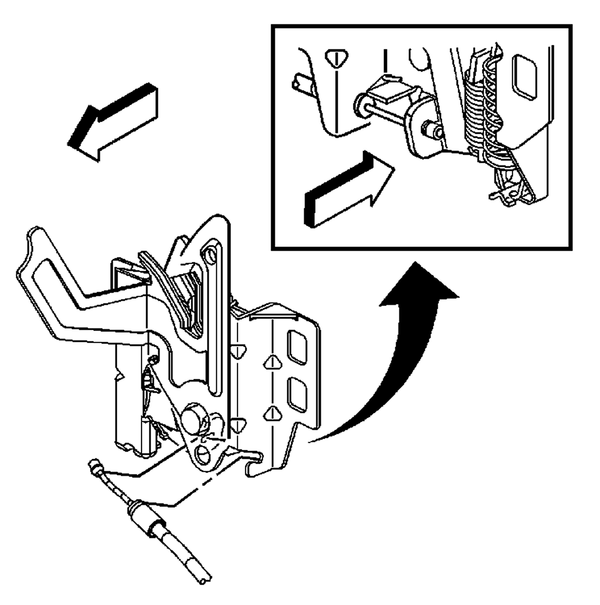
Fig. 2 Release cable to latch
Removal
When a hood hold open device
is being removed or installed, provide alternate support to avoid possibility
of damage to vehicle or personal injury.
...
Removal
1.
Remove panels and components.
2.
Remove rearview outside mirror nuts
(1), Fig. 1.
3.
Disconnect ...
See also:
Chevrolet Cobalt Owners Manual. Electronic Stability Control (ESC)
The Electronic Stability Control system assists with
directional control of the vehicle in difficult driving
conditions. The system turns on automatically every
time the vehicle is started.
- To turn off both traction control and Electronic
Stability Control, press and hold
until
illuminate ...
Chevrolet Cobalt Owners Manual
Chevrolet Cobalt Service Manual
 Hood Hinge
 Outside Rearview Mirror